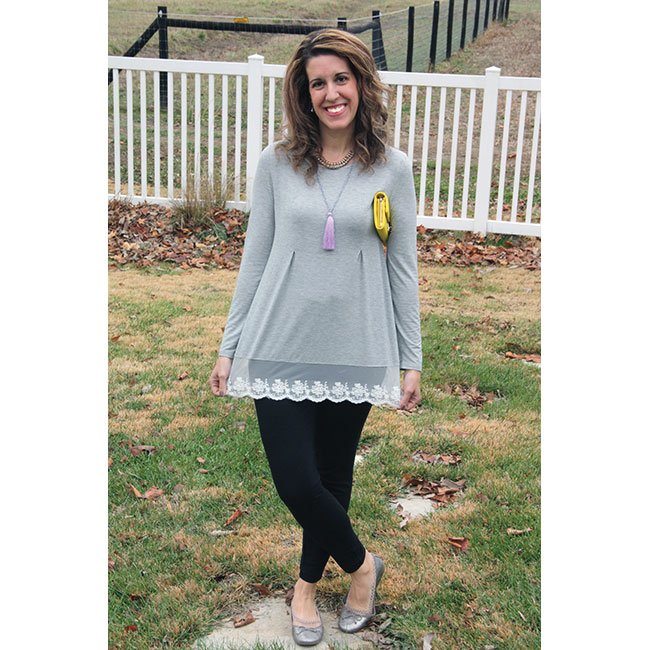
Today I have a guest post from Cacey at The Best Things… Cacey and I first became friends on Babycenter in 2006 in the May 2006 Babies Birth Board. A lot of us from Babycenter have kept in touch through the years and we actually have a Google Group now where about 20(?) of us keep in touch privately. There are some ladies that are not in the Google Group that I keep in touch with on Facebook or through emails here and there. A lot of us May 2006 Mom’s from Babycenter blog and some used to blog and have lost time to fit it in. In any case, Cacey and I have kept in touch and we hope to meet up someday in Atlanta, Georgia. She is moving to Georgia… well, right now! Cacey home schools her two children and in her spare time she has also written TWO books (both of which I have read!) that you’ll here. Cacey also participated in the 30×30 Challenge and has a love for beauty and fashion. Today she is sharing her professional knowledge on how to easily color your hair at home! Be sure to visit Cacey’s blog after reading this as she is always excited for new followers on her blog!
Okay people, shhhhh, this is a secret blog post by your guest blogger, Cacey. Read at your own risk and whatever you do, don’t repeat any of this to your hairstlylist!
So whenever people compliment me on my hair, as they do so often (just kidding, they don’t, but let’s face it, they’re all thinking it!) and I say that I cut and color my own hair their response is always disbelief. Now, I can’t teach you to cut your own hair, that one took me years to perfect. But I can teach you how to color your hair at home successfully. I promise it’s not scary. I promise, really. As with most things, though, there are a few guidelines to follow…
It’s not for everyone! Is it right for you? Well, let’s see, what do you want?
- Do you just want a tonal change? As in, do you want to go from mousy brown to pretty auburn for fall? Do you want to darken up your light brown with some more golden tones? Yes you can!
- Are you wanting to color over old highlights? I know ombre is in right now, but don’t let those six inches of roots get you down!
- Do you want to cover those five ridiculous grey hairs that insist on popping up even though you’re only twenty-eight! *Ahem* Go for it.
Are you looking for a big, drastic change?
- Do you want to go more than two shades lighter? Hair coloring in a box can only “lift” or lighten 2-3 shades and that’s only if your hair hasn’t been colored. On colored hair it technically cannot lift any, but I’ve managed to achieve at least one level of lift on old color. If you want to go much lighter, talk to your hairstylist.
- Are you wanting something more than an all over color? I know they make plenty of home highlighting kits, but I would stay away from those. Most contain peroxide (aka bleach) which you should definitely leave in the hands of professionals.
Okay, so now that we’ve decided whether or not you should attempt to color your own hair it’s time to choose your weapons.
You will need:
- Haircolor in a box! Gasp! Faint! Oh no!!! (Shhhh just don’t tell your hairstylist and everything will be fine, I promise.) I haven’t tried tons of brands, but I’ve pretty much tried all the usual suspects. My absolute favorite is Garnier Nutrisse. If you go with this brand, make sure it’s the Nutrisse! I used the HerbaShine before with not so great results. This is the “Light Intense Auburn” that I used last time. This is not for a little tonal change, this is a big tonal change. So if you want auburn go with the “Roasted Coffee Reddish Brown” This particular brand has exactly what I’m looking for in a haircolor, it smells so good, leaves my hair shiny, and it has some staying power. I colored mine the first week of May for the 30X30 challenge and it’s still fairly auburn. (Don’t talk to me about my roots, ugh!) Again, try not to stray from one or two shades darker or lighter from your natural hair. Attempting a big change should always be left in the hands of your hairstylist. That’s why they get paid the big bucks. But if it’s a small change you’re looking for, then go for it yourself!
- We’re still talking tools here, so go grab a few more things! Butterfly clips to section off your hair before you color. These aren’t the cute ones, but they hold, which is important.
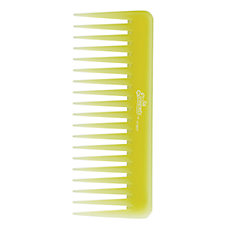
- A wide tooth comb.
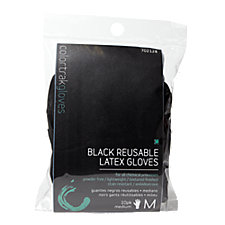
- Gloves. I know the box usually comes with a pair, but one-size fits all is not always the best way to go. I like gloves that fit so I can feel what I’m doing. Especially when I’m working in the back of my hair that I can’t see. Sally’s sells these black latex gloves for about three bucks and you can pick your size. Best part is, they’re reusable. Just wash them with soap and water and you’re good to go. All the other items above can be found at Sally’s too. (Besides the color.)
- An old t-shirt. Now at the salon you would normally wear a cape and then go to the shampoo bowl to wash out the color. But you’re at home now and on your own so what are you going to do??? Easy. Wear and old t-shirt, we all have one or two. Mine says Cozumel, Mexico and looks like someone was decapitated in it multiple times. You will probably want some old towels too. If you don’t have any old ones, go with darker colored ones that are less likely to show the color stains.
Okay, so now that we’ve chosen our color, gathered our tools of the trade, it’s time to get started on the coloring. First things first though.
- Prepare the scene of the crime. I recommend coloring in the bathroom, but before you do, pick up all your bath mats and rugs, any nice towels, and make sure the shower curtain is out of the way too. I can’t tell you how many times I’ve found errant drops of bright red haircolor on my nice white shower curtain. And that stuff does not wash out! You might want to lay down an old towel under your feet too, for drips.
- I doesn’t really matter what state your hair is in to color. It should be dry, a little dirty is fine too. If you hair has a lot of texture (mine does) you may want to straighten it first. This makes the hair so much easier to work with. Comb it through a few times and then start to section it off. Here’s how I section. (Remember I have thick, long hair, you might not need this many sections.) Basically you put your index fingers right at the top of your ears on either side and use your fingers to part through your hair all the way to the crown of your head. Twist all that up and secure it with a clip. Now all you have is the hair in the back. Using your fingers again, section off the top, leaving about a 1/2 parting at the bottom. That’s where you’re going to start.
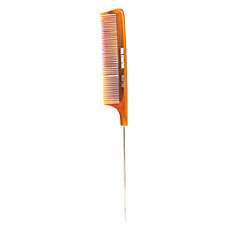
- Now mix the color according to the directions, put on your gloves and get down to business. Apply the color right along the part in the back, smooth it in with your hand. If your hair is longer than this, squirt some more color and keep smoothing it down with your hands to make sure it’s saturated all the way to the ends. Then take your wide tooth comb and comb it through to ensure that it’s all covered. Part off you next section. Again, just slice as straight as you can through the part and clip up the rest. Keep applying your color to each section. When you go to comb through this next section, it’s okay to let it touch the already colored hair. Also if you’re having a hard time keeping your parts clean, you can use a rat-tail comb like this. (Available at Sally’s)
- Now continue parting and applying the color until you finish the entire back section. When you start on the front/top section you’re going to part differently. This time take your partings starting from the top of you ears and work your way up. You can do one side at a time, it doesn’t matter. Don’t forget to keep combing through!
- Now that you’re finished, twist up all that hair and clip it up out the way. And start your timer! You might want to check your hairline for any dry spots without color. If you’ve made a mess of yourself like I usually do, squirt a little extra color onto your finger, rub it around your hairline or neck and then wipe with an old towel. Yup, the color will remove the color! Follow the timing on the directions. If you’re not sure, five minutes really doesn’t make that much of a difference. The haircolor loses strength as it processes it. I left mine on for the full thirty that was recommended for grey or resistant hair and was quite pleased with the results.
- When you’re time is up it’s time to rinse. Slip off that nasty t-shirt (it will get nastier as you pull it over your head) and jump in your shower! Don’t even try to rinse in the sink, that is way too much trouble. Your shower will come clean, I promise. Now rinse, rinse, rinse, rinse! The red that I use takes forever to rinse out, but be patient! I know the box just says to rinse and then apply the conditioner, but wait, shampoo! Pay attention next time you’re in the salon and you’ll notice the hair stylists always shampoo out color, not just rinse. The chemical work of the haircolor is done, no harm will come to it by shampooing, promise. Sometimes I shampoo more than once. Once your water runs clean you’re good to go! *Disclaimer, if you go with something dark or the really red like I did, don’t be surprised if the water never runs clear. Mine was still bleeding out red in the shower a week later, oy!
You did it! Congratulations! Enjoy your new look.
A few final tips:
- To ensure the life of your color, try not to wash more than necessary. Every other day should be fine. I try to only wash mine every three. Dry shampoo in between if you have to.
- If you have long, thick hair go with two boxes of color, you don’t want to run out halfway through. If you only bought one box and want to color anyway, do the top section first. If you run out and haven’t done the bottom section, no worries, most of that doesn’t show anyway! (I’ve done this before, it’s really no big deal.)
- If your color is a bit bolder than you anticipated don’t fret! A good bit of that color will fade pretty quickly in the first two weeks. If you want to hurry that process you can always wash it more often, or even strip it a bit with by washing it with dish soap. Yup, dish soap. Just make sure to deep condition it afterwards. My hair was super bright red when I first colored, but I love it!

*Disclaimer: Before I was a stay-at-home mom/homeschool mom/self-published author I was a licensed hairstylist (I suppose I technically still am). I hope with these tips you can achieve haircolor success at home. If not…errrr…well…um…. Any questions?


