I’m back with another You Asked, I Answered post! Recently I did an Indoor Photography & Flat Lay Tips post (read it HERE) and now I’m finally sharing an Outdoor Photography Setup & Tips post. I had planned to get this post up last month, but since my husband takes ALL of my outfit photos… I needed to enlist him to help me write this post. So, finally I am excited to be sharing this post with y’all and I hope it helps some of you out! If any of you have anymore questions, leave them in the comments and I’ll make sure that my husband answers them. 

I’ve decided to start a series this year called You Asked, I Answered. This fun series will cover topics that I’ve had blog readers ask me to answer. I have a whole list in my Notepad where I’ve jotted down questions you’ve had for me and that you’ve been wanting me to answer. I figure, if so many of you are asking me the SAME questions, it would be easier to answer it in a post AND I am sure others are wanting to know the same thing! If there is anything you would like me to cover, please let me know in the comments.
Let’s Get Started with Outdoor Photography Setup & Tips:
Our Outdoor Camera Gear:
Shop This Post:
CowboyStudio Aluminum Adjustable Light Stand (2)
Yongnuo YN600EX-RT II Speedlites (2)
Yongnuo YN-E3-RT Speedlite Wireless Transmitter
Rogue Color Temperature Orange Gel
Overall Outdoor Setup:

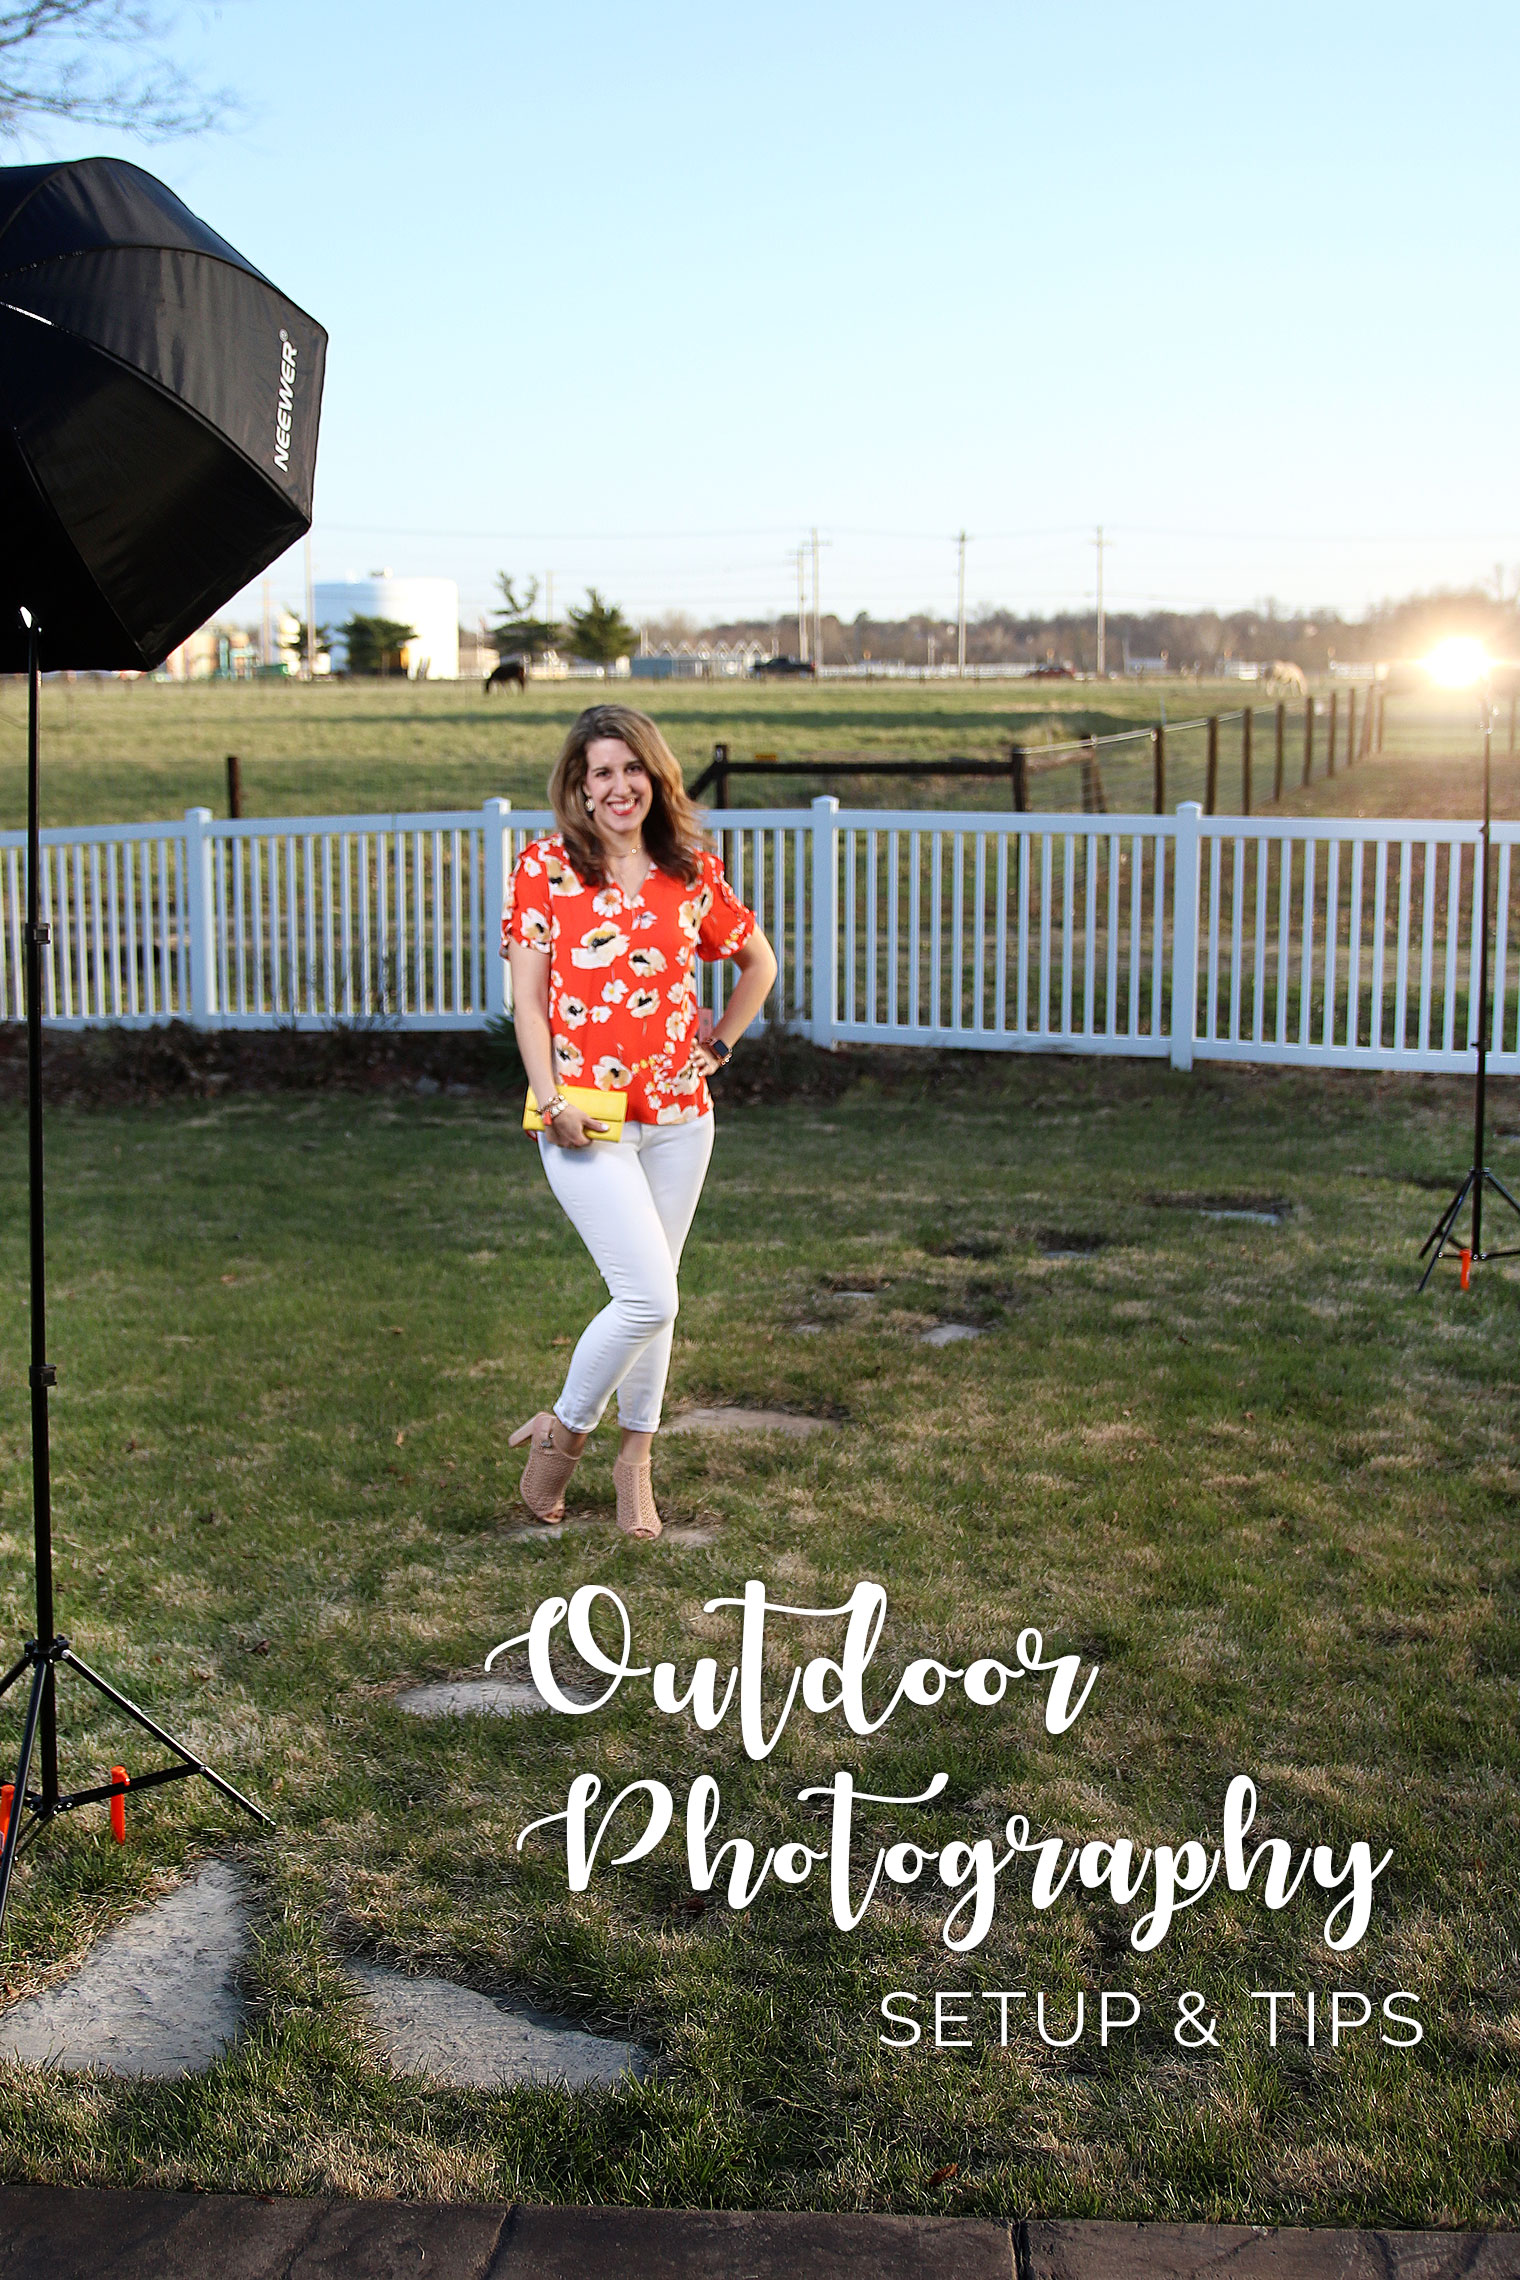
Our setup for taking Carrie’s outdoor outfit pictures is pretty simple. We take most pictures in our backyard, and the the farm behind our house serves as our background, including a pair of very curious horses who like to peek over the fence and check out what the humans are doing! We hope to start exploring some different areas once the weather warms up, instead of always taking the photos in the backyard.
We take pictures just before sunset if we can. This time of day is called the “Magic Hour” of photography because of the perfect lighting. Being busy parents with lots of activities, though, we can’t always get out there when there’s perfect lighting, so we use a pair of flashes to make sure that the pictures always look good even when the sun isn’t cooperating. The main flash that is positioned right in front of Carrie in a 32″ Soft Box and is the main light for the photo. If the sun is in a good place and throwing that nice glow in Carrie’s curls, then the main light is all we use. However, If the sun isn’t cooperating we sometimes also add a second flash to add a soft glow to her hair, which we did when we took these photos. It’s positioned where the sun should be, just behind Carrie.
You might ask why would you use extra lighting on an otherwise bright day? The problem is really that it’s TOO bright. If I focus on Carrie and get the exposure right for her, the skies are too bright and appear “blown out”. They show up all-white with no nice blue or clouds. If I expose for the sky, then Carrie appears too dark, and we can’t use the picture. Flashes are the answer. They let me expose for the sky, and add extra light to Carrie so that she matches. This is a technique called (deep movie announcer voice) “Overpowering the Sun”. Which sounded very cool to me the first time I heard it! I want to overpower the sun!
Camera Settings
To setup for the picture I put the camera in manual mode (“M”) and start trying to get the background exposed correctly. I set ISO to 100, and the aperture to F/1.8 or F/2.0 which puts Carrie in focus and gives a nice background blur to the farm (and the nosey horses) behind her. Then I adjust the shutter speed for the ambient light, until I have the background looking a little dark (about 1 stop underexposed). This is normally a shutter speed of around 1/1000 of a second depending on how bright the sky is. Making the background a little darker makes the colors more vibrant and helps Carrie to stand out.
Equipment Details for Outdoor Photography:
Portait Lens

We take Carrie’s outfit pictures using a Sigma 50-100mm F/1.8 Art Medium Telephoto Lens. I stand about 20 feet away from Carrie and zoom in to take the picture. Telephoto lenses with longer focal lengths (>55mm for our Canon Rebel) are the way to go for portraits. The higher the focal length of the lens, the less distortion you’ll have in the picture. We use the Sigma Art series both for our indoor and outdoor photos, and they’re really fantastic lenses. The 50-100mm is the “big brother” of the 18-35mm that we use for most of the product shots. It’s a big, heavy lens, so you need to be careful hand holding it. But once you get used to it it takes great pictures!
Flash

Once I have the camera and lens set, I work on the flashes to add the extra light to Carrie so that she matches the background exposure. Our lighting uses a pair of Yonguo 600EX-RT II Speedlites. These are very inexpensive flashes and are almost exact copies of the Canon 600EX-RT II, but they cost 80% less. They are positioned off camera and controlled via a radio transmitter (the Yongnuo YN-E3-RT) that sits in the camera hot shoe. The transmitter sets the power of the flashes and fires them when we take a picture.
The main flash right in front of Carrie is set to use “Through The Lens” mode (TTL). Using TTL the camera determines how bright to fire the flash based on the light that it sees “through the lens” with its built-in light meter. It’s helpful to set the camera to “spot” metering so that it’s only looking at the light right on Carrie, rather than trying to set the flash based on the entire scene.
Sometimes we also add a second flash to add a soft glow to Carrie’s hair and make her standout from the background. I set the transmitter to fire this one at full power and not worry about the light that the camera is metering.
Softbox

The main flash sits in a Neewer 32″ Softbox which is on a light stand right in front of Carrie. Using a softbox shapes the light from the flash and makes it less harsh and more flattering. This light is positioned directly in front of Carrie and above her, pointed down at around 45 degrees. It doesn’t show up in the frame because we’re zoomed so far in.
Back/Hair Light

The sun wasn’t cooperating the day we took these pictures (it was a little cloudy) so we made our own sun with the the Yongnuo YN600EX-RT II Speedlite. The orange plastic film on it is a Color Temperature Orange (CTO) gel which makes the flash look more like sunset light.

The nice orange glow you see in Carrie’s hair was created by the Yongnuo YN600EX-RT II Speedlite sitting behind Carrie and just outside of the frame.
Stakes to Keep Lights Upright

The biggest problem I’ve had with this setup is the wind. The softbox is really just a backwards umbrella and it likes to blow over. We’ve already had to replace one that was damaged by falling. I’ve tried a number of things to fix this. Some photographers use sandbags to weight down the lightstand, but I haven’t had much success with them on the soft ground. I’ve also tried having our 11 year old son hold it, but he’s easily distracted by bugs, birds, horses or a sometimes just a pretty rock. The best solution I’ve found is to use plastic camping stakes to hold down the lights. They’re inexpensive and work great!
Shop This Post:

Be sure to check out my Indoor Photography & Flat Lay Tips post!
If there is anything you would like to see me write a post about this year, be sure to leave it in the comments. I’d love to add it to my list of topics for this series.
*This post contains affiliate links.
