Hey everyone! Today I have a special post from DIY blogger Alice V from DIYerfy.com. She is sharing an upcycle project that she created from an old palette. I just love palette projects, they are such a versatile and fun piece to make over. Read on to learn how to create your own 10-Bottle Wine Rack from an old pallet.
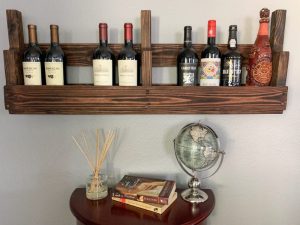
There is something special about taking materials and reusing them for something else. Upcycling products and giving them new purpose makes those products a little more enjoyable. Recently I’ve taken a liking to the idea of reusing discarded pallets and turning them into home décor for my home. My latest pallet upcycle feat is the 10-bottle wine rack!
Choose the Right Pallet
You may be anxious to just dive right in with any old pallet you can find anywhere but even though many of these are “throw away” items that businesses tend to use and discard later, you can’t use just any pallet for home décor. You need to choose wisely. Here are a few tips in choosing the right pallet:
- Choose a pallet that isn’t weathered and rotted. You can tell these pallets because they would have lost their wooden luster and natural colors. They are typically greying, dull, and brittle.
- Choose a pallet that isn’t broken. You’ll want as many good pieces of wood as possible so unless you are going to saw the pieces into smaller ones, stay away from broken pallets.
- Opt for the best looking in the stack. Try to get pallets that are sturdy and free of cracks. These haven’t been overly used and are more likely to be the best of the bunch for what you want to make.
Even though you are clearly trying to get the best pallet you can find for free, this doesn’t mean that it will take you forever to find one. Many businesses throw out pallets after their deliveries are made. They tend to not need them and they may even start stacking them up behind their shop. There’s nothing wrong with asking if you can take them off their hands for free. But do wear gloves that will protect your hands from splinters. And do keep in mind that pallets are not light, they can be quite heavy so you may need to take an extra person with you to help you move them.
Tools You Will Need
- Sander. I use the Dewalt power circular sander.
- Sanding paper. We used 60 grit in our projects because it’s strong enough to even out waves in the wood while getting ride of splinters and leaving a nice soft finish. Plus that’s what we had on hand.
- Pallet nail remover tool. Pretty much just helps get the nails out for disassembling a pallet and resembles a crowbar.
- Nails or screws. We used 3/4 inch screws.
- Hammer (if you’re using nails) or screwdriver. We used the Dewalt power drill.
- Safety glasses to keep saw dust out of your eyes.
- Sanding safety masks to keep you from breathing in saw dust.
Optional items:
- Sealer or wood paint of choice.
- Burning torch tool and propane canister
Disassembling and Prepping a Pallet
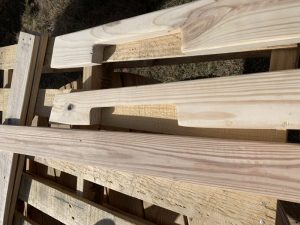
So I have seen shortcuts online where you can just cut the pallet in half and continue on your way, but this my friend, is the lazy way of doing it. It’s lazy because you won’t be able to sand as many edges as you should. Pallets aren’t always made of the best wood and so splinters are a huge concern. But to each is his own and I won’t judge you if you want to take the shortcut. We completely disassemble, sand the pieces with a sanding power tool, and then reassemble using screws rather than nails. You could manually sand the wood but it is easier and faster to use a hand saw instead. Power tools are the way to go when doing this kind of DIY.
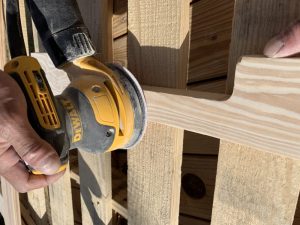
Once your pieces are sanded to your liking, clean off your work area of saw dust. Also clean your pieces off with a clean dry cloth. Now the next step depends on if you are burning your wood or not. I prefer to burn the wood while it is still separate but this time we did it after it was assembled. Burning your wood pieces brings out the natural rings of the wood and gives them a dark luster which looks beautiful with lighter stains. You can opt to skip this step as it technically isn’t necessary.
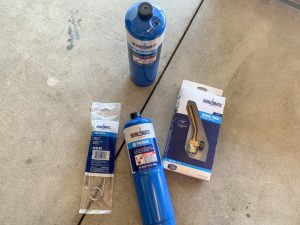
Tip for burning wood: the goal of wood burning is to try and make the darkening an even color. If you burn too long, it will look burned. If you move too fast, it will lighten the burn. Slow and steady pace will leave a more even burn. This is a tricky thing to do because you’ll need steady hands and will have to adjust accordingly as you move along the wood while keeping the propane from moving around in the canister.
Assembling
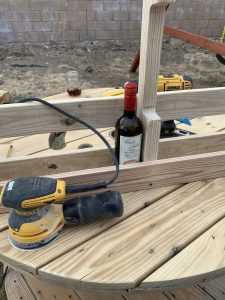
We cut the long curved pieces in half, to make the wine rack just a little taller than a bottle of wine. We reassembled the pieces using the screws so that we created a rack for the bottles to sit in. If you reassemble the same way that we did, your wine rack will be the same length as a normal pallet. Or you can opt to use a saw to cut the wine rack in half, creating a 5-bottle wine rack instead of a 10-bottle wine rack. The choice is yours but if you want to stay away from making more cuts, just go with the 10-bottle option.
Paint, Stain, or Burn
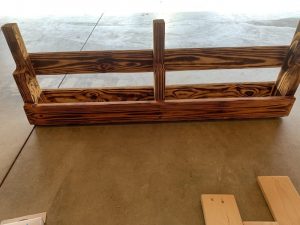
The fun part comes at the end but this is best done in a well ventilated area that is also a controlled environment. We opted to do these things inside the garage with the garage doors opened. This allowed us to work in a semi-open space out of the wind and sun. We used a dark stain to match the pictures and furniture in our dinning room. Let it dry overnight before bringing inside. You may even want to let it sit a few days longer to allow fumes to fully dissipate.
Wall Mounting Your New Home Decor

We used D-ring hangers and heavy-duty picture frame hooks to mount the wine rack with. The D-rings easily screwed onto the back of the wine rack. We then used picture frame hooks rated at 50 lbs. I like using these because you don’t need to find a stud to use them, simply push the long side into the wall and they will curve and hook round, creating a secured way to hang wall displays. Now that you have a unique and one-of-a-kind wine rack, start stacking it up with your favorite bottles of wine!
Author

Alice V is a mom of two who loves to learn, craft, and DIY whenever she can. She blogs at DIYerfy.com about all things DIY in life. Alice is sharing a FREE printable for you to download today, it is perfect for the wine lover. Download it by clicking HERE.
Be sure to check out Alice on Pinterest, Facebook, Twitter, and Instagram.


