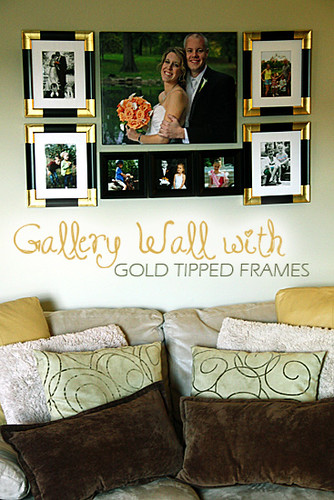
Today I am going to share with you a DIY project that I have been talking about for over a year… that took hours of my time and devotion these last two weeks. But, finally… all of the effort has produced a beautiful gallery wall in the family room above the couch. Brian and I just LOVE it. I really should have taken a picture of what I had hung above the couch prior to this beautiful gallery wall, but… I won’t bore you.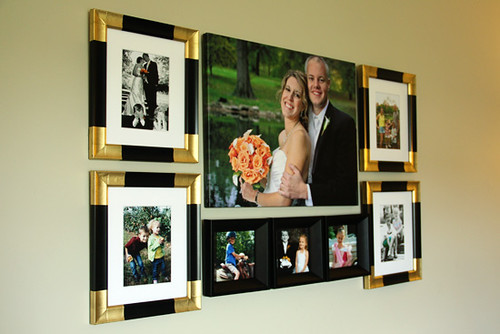
Why did this gallery wall take so long for me to create? Well, for one… I had to decide what sort of layout I wanted with the frames, there are a lot of examples of frame compositions on Pinterest. Once I selected the 4 8×10, 1 20×16 an 3 5×5’s, I had to purchase the frames. I decided to buy the black frames at Hobby Lobby as they were only $5 a piece at 50% off. Yes, I bought the cheapo ones without any mattes and I did the gold tips myself (read about that below!). I also decided I wanted to order a canvas for the 20×16 to add some visual appeal and I knew it would become the focal point against the other frames. 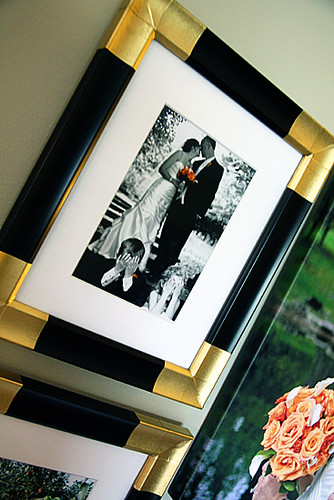
Brian and I just got married last October and we included the kids in our wedding. Pictures by Jay did our photos, just loved working with them. I thought about creating a gallery wall with photos entirely from our wedding, but decided against it. I wanted to add in some every day photos, too! I also made some of the photos black and white, some of them show some colored areas in the black and white photo (such as Autumn’s painted nails show up in this black and white photo) and some of the photos are in color. I love variety and it really spiced the gallery wall up a bit.
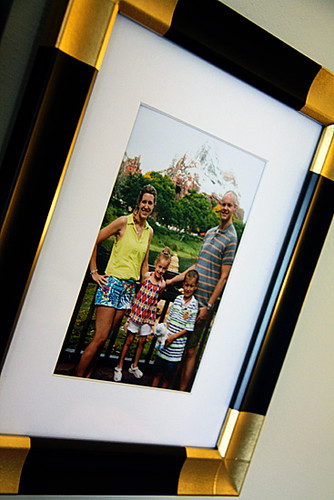
I ordered the 8×10 white mattes from Golden State Art at 40 cents a piece. I ordered a variety of mattes in gray, gold, sage green and white to try out some different colors in the frames. I decided to stick to all white mattes. The photo inside the matte is 5×7.
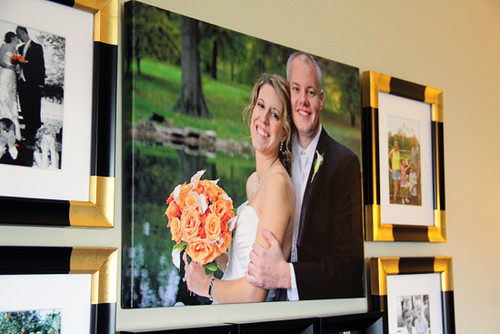
The 20×16 canvas I ordered from Easy Canvas Prints and the quality of the canvas is excellent. Brian’s head is really close to the top of the canvas and they gave the option for us to mirror the image on the top side of the canvas instead of stretching it (which would have stretched his head off the front of the canvas!). The canvas only cost me $44.70, because they gave me 50% off and free shipping as a new customer!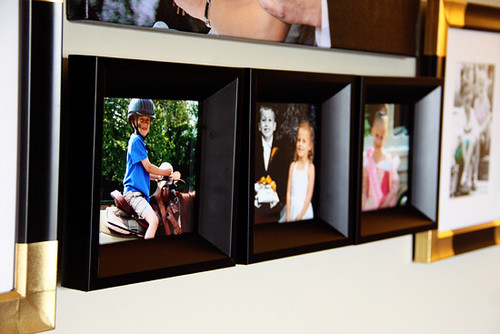
The 5×5 squares do not contain a matte, but the frame sort of bevels in, which leads the eye to the photographs inside.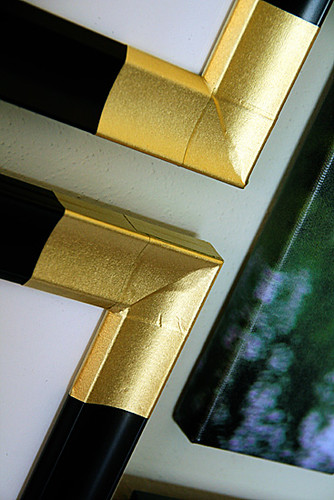
A last minute decision I made was that I wanted the 8×10 frames to have gold tips. Gold tips are seen everywhere right now and I am just loving gold and had to have these gold tips on my frames. I assumed I would just spray paint the actual tips of the frames, but found an awesome tutorial on Pinterest that shows you how to use FROG TAPE, yes… painters tape!! to make gold tipped frames. Ummm. This is so wonderful, because you can take it off anytime you get tired of the gold on your frames. Brilliant, right?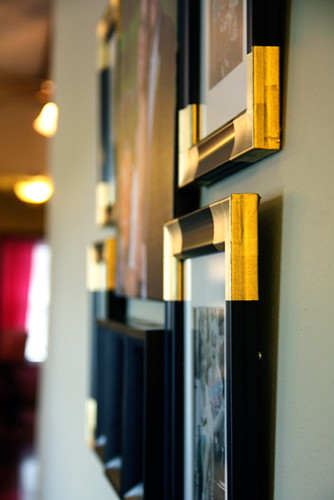
And, seriously? Can you tell this is frog tape? Can you? I can’t. Brian thinks it looks like gold leaf. Well, that is the name of the gold color I used!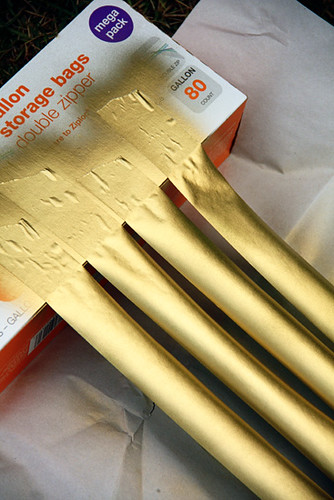
So, I am going to let you in on the gold tape secret that I found on A Thoughtful Place. Get some of the thicker frog tape and spray paint it gold. Let it dry for 15 minutes.
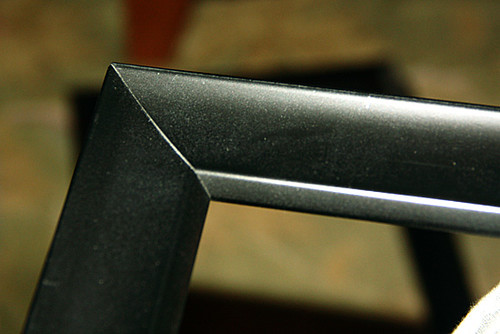
Measure your frame. I didn’t really need to do this, but I did. I did the thickness of the tape on each side of the corner.
Then, tape. I cut a smaller piece to fill in the square area in between the two pieces of tape that I taped on each side. Trust me, it blends in and stays stuck together really well. Its seamless. Its amazing how easy this is to do… 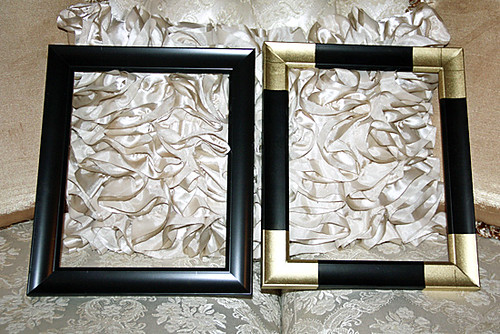
Then I did a side by side comparison for fun. See cheapo black Hobby Lobby frame on left? See polished gold tipped Hobby Lobby frame on right. Such a difference!
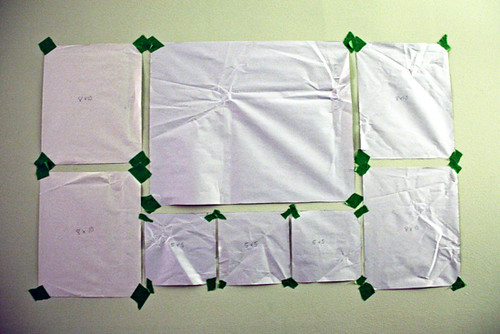
If you’ve ever done a gallery wall, I am sure you’ve done this… I cut out the frame sizes on paper (the same paper that HobLobs wrapped my frames in when I bought them!) and then I taped them on the wall with frog tape. Gotta love the frog tape for this project. Make sure they are level. Then, grab the hubby to hang all of these lovely frames for you. Yep, Brian did the hanging. I’m a lucky girl that he’s my slave hanger.

Annnnnd. Finally. After all of that. You have this. I think the hardest part of this entire project was just trying to decide WHICH photos to put in the frames. I probably spend a good 6 hours fighting over a folder on my desktop, deleting and replacing, etc. until I decided which photos were PERFECT enough to be displayed on my wall. Ahhh. I do tend to over agonize about photos.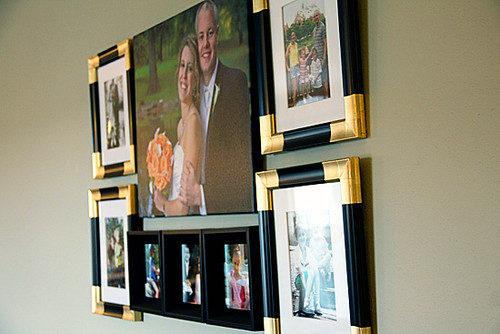
Now that I got this done… it is time to finally finish decorating the Master bathroom. Another project I want to try to wrap up before summer is done.
Linked up to these parties:
Submarine Sunday #42
Brag About It Link Party
Fluster Buster’s Creative Muster Linky Party
The Inspiration Exchange {No. 10}
Hookin Up with HoH #159
Inspiration Gallery Link Party 46
Inspire Me Please Weekend Blog Hop #22
Get Your DIY On
Share Your Creativity
Your Design This Time
Say G’Day Saturday
Snickerdoodle Sunday
Bewitch Me & Titi Link Party
Link it or Lump It
Frugal Crafty Home Blog Hop
Hit Me With Your Best Shot
Moonlight & Mason Jars
Create It Thursday
Sweet Haute
Pinworthy Projects
Monday Funday Party
